Easy Strawberry Jam: Just 3 Ingredients for Homemade Taste
There's nothing quite like the vibrant burst of summer captured in a jar of homemade strawberry jam. That sweet, ever-so-slightly tart flavor, the gorgeous ruby-red hue, and the smooth, glossy texture can transport you straight to a sun-drenched berry patch with just one spoonful. Many people shy away from making jam, assuming it's a complicated, time-consuming process. But what if we told you that creating this culinary masterpiece could be incredibly simple, requiring just three basic ingredients and a little bit of patience? Get ready to embrace the joy of DIY preserving, because we’re about to unlock the secret to effortlessly delicious easy strawberry jam that tastes profoundly better than anything you’ll find on a supermarket shelf. When the pick-your-own season arrives, and market stalls overflow with juicy, scarlet berries, it’s a clear sign that summer has officially begun. This abundance isn't just for snacking; it's a golden opportunity to get your jam on! And even in the off-season, frozen berries picked at their peak ripeness offer a perfectly suitable stand-in, ensuring you can enjoy homemade strawberry jam all year round.The Magic of Just Three Ingredients: What You Need
The beauty of this simple strawberry jam recipe lies in its minimalist approach. You truly only need three core components to transform fresh or frozen fruit into a luxurious spread. Each ingredient plays a crucial, synergistic role in achieving that perfect balance of flavor, texture, and preservation.Here’s what you’ll need:
- Strawberries: The star of the show!
- Granulated Sugar: For sweetness, preservation, and structure.
- Fresh Lemon Juice: To brighten the flavor and aid in setting.
Understanding Your Ingredients
Let's dive a little deeper into why these specific ingredients are non-negotiable for a truly exceptional homemade strawberry jam.Strawberries: Fresh vs. Frozen
Whether you opt for fresh or frozen, the quality of your strawberries directly impacts the flavor of your jam. When choosing fresh strawberries, look for berries that are:
- Bright red all over (no white shoulders).
- Plump and firm, not mushy or bruised.
- Fragrant – a strong strawberry aroma indicates ripeness.
In the absence of peak-season fresh berries, frozen strawberries are an excellent alternative. They are typically picked and flash-frozen at their prime, locking in flavor and nutrients. Just be sure to thaw them completely before starting your jam to ensure even cooking.
Granulated Sugar: More Than Just Sweetness
Sugar in jam serves multiple purposes beyond just making it sweet. It acts as a preservative, inhibiting microbial growth and extending the shelf life of your jam. Furthermore, sugar interacts with the fruit's natural pectin, helping the jam to set into that desirable thick, spreadable consistency. While some recipes call for specialized jam sugar with added pectin, for this easy strawberry jam, standard granulated sugar works beautifully because strawberries, especially when combined with lemon juice, contain enough natural pectin to achieve a good set.
Fresh Lemon Juice: The Unsung Hero
Don't skip the lemon juice! It's an absolutely critical component in making strawberry jam for several reasons:
- Pectin Activation: The acidity in lemon juice lowers the pH of the mixture, which is essential for activating the natural pectin present in strawberries. Without sufficient acidity, your jam might struggle to set properly.
- Flavor Brightness: Lemon juice cuts through the sweetness of the sugar and strawberries, adding a lovely tangy counterpoint that enhances and brightens the overall fruit flavor, preventing the jam from being overly cloying.
- Prevents Crystallization: The acidity also helps prevent the sugar in the jam from crystallizing, ensuring a smooth texture.
Always use freshly squeezed lemon juice for the best flavor; bottled varieties often lack the same vibrancy.
Demystifying the Jam-Making Process: A Step-by-Step Guide
Making homemade strawberry jam with just these three ingredients is a wonderfully straightforward process. Many traditional recipes, including those championed by culinary icons, follow a simple stovetop method that has stood the test of time.- Prepare Your Strawberries: Wash your strawberries thoroughly. If using fresh berries, hull them (remove the green leafy tops and core). Depending on their size, you can leave smaller berries whole, halve larger ones, or roughly chop them for a more uniform texture. Remember, smaller pieces cook down faster.
- Combine Ingredients: In a large, heavy-bottomed pot or Dutch oven, combine your prepared strawberries, granulated sugar, and fresh lemon juice. Stir everything together gently until the sugar begins to dissolve and coat the berries. Let the mixture sit for 15-30 minutes if you have time; this allows the strawberries to release some of their natural juices, which helps prevent scorching when you start cooking.
- Bring to a Boil: Place the pot over medium-high heat. Stir occasionally until the sugar has completely dissolved and the mixture comes to a rolling boil – a boil that cannot be stirred down.
- Simmer and Cook: Reduce the heat slightly to maintain a vigorous, but not violent, boil. This is where the magic happens! The strawberries will break down, and the liquid will begin to thicken. Stir frequently, especially as the jam thickens, to prevent it from sticking to the bottom of the pot. Skim off any foam that rises to the surface with a spoon; this isn't strictly necessary but results in a clearer, more visually appealing jam.
- Check for Set: This is the most crucial step for achieving the perfect consistency. The goal is to reach a temperature where the fruit's natural pectin has done its thickening magic. For detailed guidance on this, check out our comprehensive article: Homemade Strawberry Jam Tips: Perfect Set with Thermometer. Generally, this means reaching a temperature of 220°F (104°C) using an instant-read thermometer. Alternatively, you can use the cold plate test: spoon a small amount of jam onto a chilled plate, let it cool for a minute, then push it with your finger. If it wrinkles, it's ready!
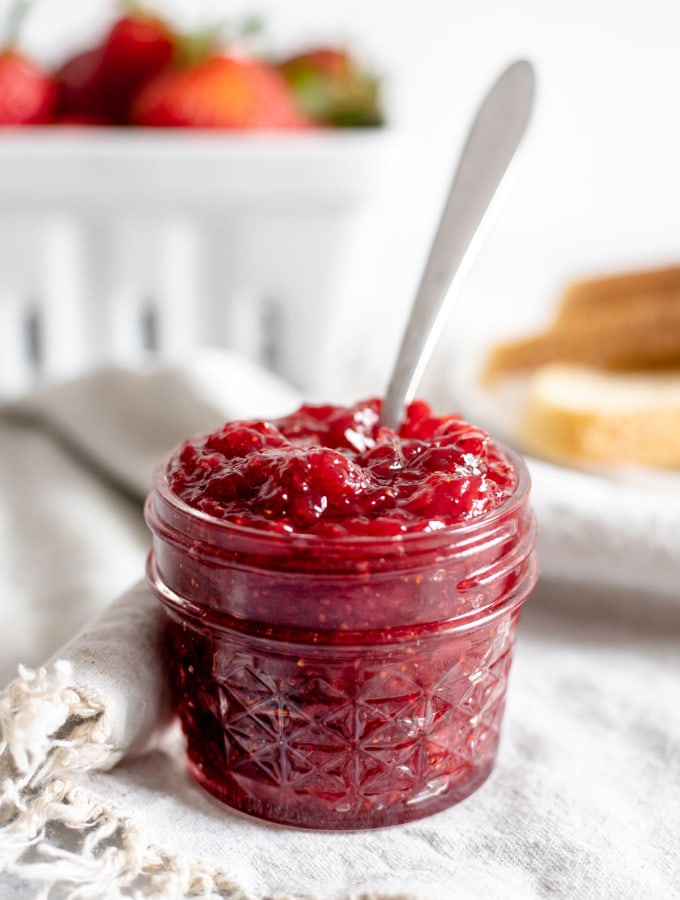
- Jar It Up: Once your jam has reached its setting point, carefully remove it from the heat. Ladle the hot jam into sterilized jars, leaving about 1/4 inch of headspace. Wipe the rims clean, secure the lids, and allow the jam to cool completely at room temperature.
The entire active cooking process for this easy strawberry jam takes approximately 30 minutes, making it one of the quickest and most rewarding homemade preserves you can prepare. For more insights on the speed and efficiency of this method, read our article: Quick Strawberry Jam Recipe: Make It in 30 Mins (Fresh or Frozen).
Beyond the Basics: Tips for Perfect Strawberry Jam Every Time
While the core recipe is simple, a few extra insights can elevate your strawberry jam from good to absolutely phenomenal.- Choosing the Right Pot: A wide, heavy-bottomed pot is ideal. The wide surface area allows for quicker evaporation, which means less cooking time and a brighter, fresher tasting jam. The heavy bottom prevents scorching.
- Don't Overcook: Overcooking can lead to a darker, duller jam with a caramelized flavor that overshadows the fresh strawberry taste. It can also make the jam too stiff. Keep a close eye on your thermometer!
- Small Batches are Best for Beginners: If you're new to jam-making, start with a smaller batch (around 2-3 pounds of strawberries). It cooks faster and is easier to manage, reducing the risk of over or under-cooking.
- Sterilize Your Jars: While this recipe is designed for refrigerator storage, proper jar sterilization is crucial if you plan to extend its shelf life through traditional canning methods. Even for fridge jam, clean, hot jars reduce the risk of spoilage. You can wash jars and lids in hot, soapy water, then rinse well and either dry them in a low oven (250°F / 120°C) for 10-15 minutes or run them through a sanitize cycle in your dishwasher.
- Troubleshooting a Runny Jam: If your jam doesn't set, don't despair! You can usually re-cook it. Return the jam to a clean pot, bring it back to a boil, and cook it again, checking the temperature and set more carefully. Sometimes, a tiny bit more lemon juice can also help.
Serving Suggestions & Storage: Enjoying Your Homemade Creation
Once your glistening jars of strawberry jam have cooled and set, the real fun begins: enjoying your creation! This sweet, slightly tangy spread is incredibly versatile.Ideas for Serving:
- Classic Breakfast Topping: Spread generously on warm toast, fluffy scones, crumpets, or fresh croissants.
- Dessert Enhancer: Spoon it warm over vanilla ice cream for an instant, luxurious treat. Use it as a filling for cakes, tarts, or thumbprint cookies.
- Yogurt & Oatmeal: Stir a dollop into your morning yogurt or oatmeal for a burst of fruity flavor.
- Savory Pairings: Believe it or not, strawberry jam can be a fantastic accompaniment to cheese boards, especially with creamy cheeses like brie or goat cheese.
Storage:
This simple strawberry jam, without proper canning, will last beautifully in the refrigerator for up to two weeks. For larger batches and a significantly longer shelf life (up to a year or more), consider familiarizing yourself with proper water bath canning techniques. This involves processing the filled, sealed jars in boiling water, which creates a vacuum seal and preserves the jam for extended periods.
